REVIEW · REYKJAHLID
2-Hour UTV Buggy Tour in Myvatn
Book on Viator →Operated by Geo Travel ehf · Bookable on Viator
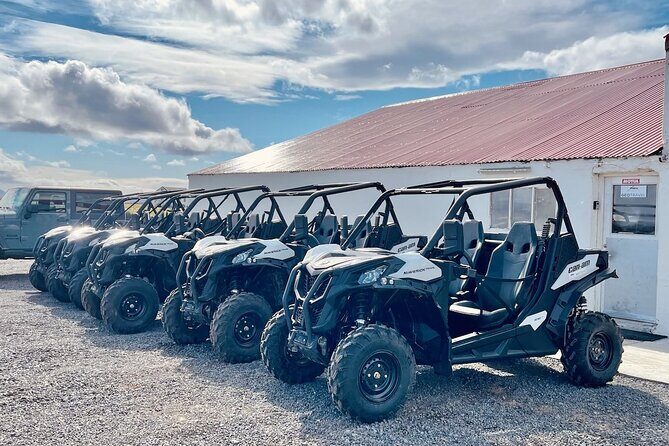
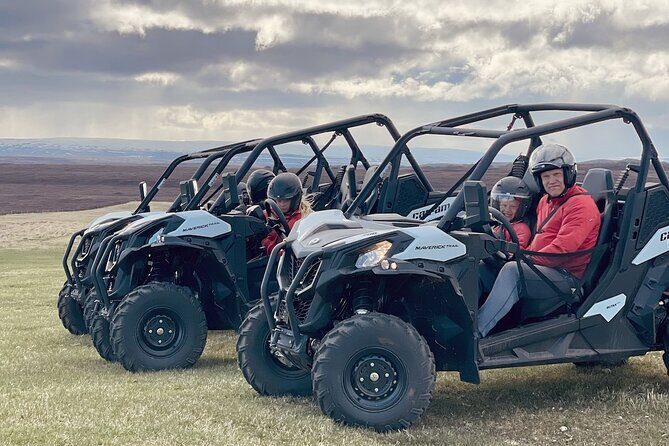
Two hours can feel like a whole Iceland highlight. This 2-hour UTV buggy tour turns the Myvatn area into a hands-on driving experience, with stops picked for big views and real geology. I love the adrenaline of being behind the wheel, and I love the tight small-group setup (up to 10 people) that keeps the day feeling personal. One thing to plan for: you need a valid driver’s licence, and the tour depends on good weather, so it can get rescheduled if conditions aren’t right.
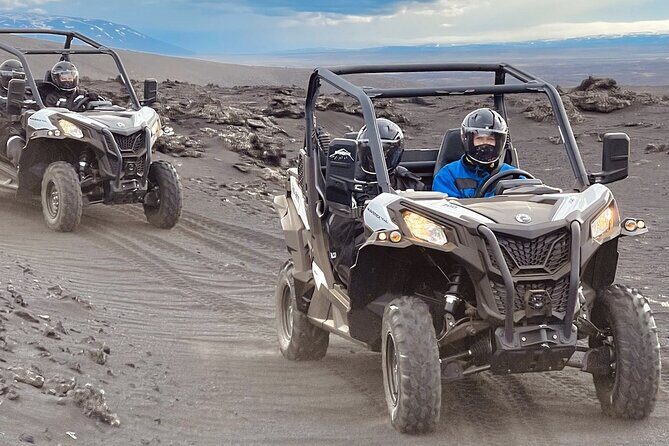
What makes this tour especially fun is the flow: you start with a short drive to the Hverfjall crossing area, then spend most of your time moving around the volcanic terrain with brief stops to get your bearings and look around. You’ll hit Lake Mývatn first, then roll through volcanic zones, past Dimmuborgir’s lava formations, and end back at Reykjahlíð by quieter back roads.
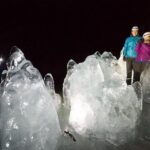
You don’t have to guess how to dress or whether you’ll be safe. Helmets are included, and you’ll be given a warm overall if you need one, plus you get safety lessons before you drive. In past groups, guides such as Alejandro and Alessandro have been praised for clear, friendly storytelling about the geology and local places (and for keeping the tone relaxed even on a cold day).
In This Review
- Key things I’d watch for
- What You Do on This UTV Ride Around Myvatn
- Price and Value: Why It Costs What It Costs
- The Real MVP Is the Guide (Alejandro and Alessandro Stand Out in Feedback)
- Meeting in Reykjahlíð and What to Bring
- From Base Camp to Hverfjall Crossing: Getting Oriented
- Stop 1: Lake Mývatn and the Nature Reserve Areas
- Stop 2: Ludentshaedhir Through Volcanic Terrain
- Stop 3: Dimmuborgir Lava Formations on the South Side
- Stop 4: Namafjall Hverir and the Less-Mainstream Side Route
- Stop 5: Reykjahlíð Back Roads Finish the Loop
- Group Size, English, and the Comfort Factor
- Is This UTV Tour for You?
- Should You Book This UTV Buggy Tour in Myvatn?
- FAQ
- Do I need a driver’s licence to join the UTV buggy tour?
- How long is the UTV buggy tour?
- How many people are in each tour group?
- What language is the tour offered in?
- What gear is included?
- Is admission required for the stops?
- Where do I meet for the tour?
- Will I drive the whole time?
- What happens if the weather is poor?
- Is insurance included, and are damage costs covered?
Key things I’d watch for
- You drive, not just ride: the excitement is built around getting wheel time and following the guide at a smart pace
- Small group cap (10 max): easier questions, quicker safety guidance, less waiting around
- Multiple Myvatn highlights in 2 hours: Lake Mývatn, Dimmuborgir area, Namafjall Hverir side-route
- Helmet and warm overall included: less to pack, more comfort during stops and driving
- Weather matters: if it’s canceled for poor conditions, you’ll be offered a different date or a full refund
What You Do on This UTV Ride Around Myvatn
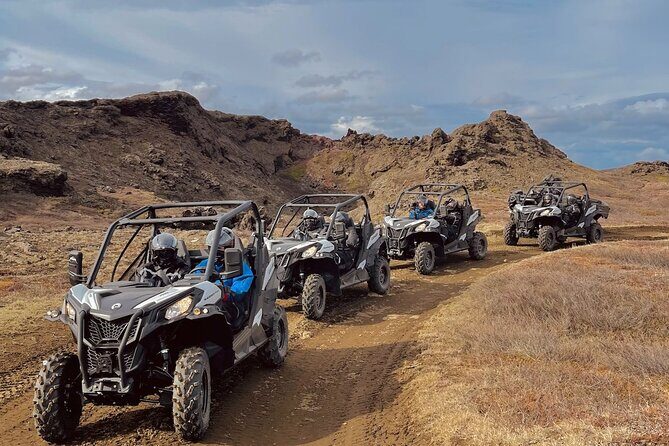
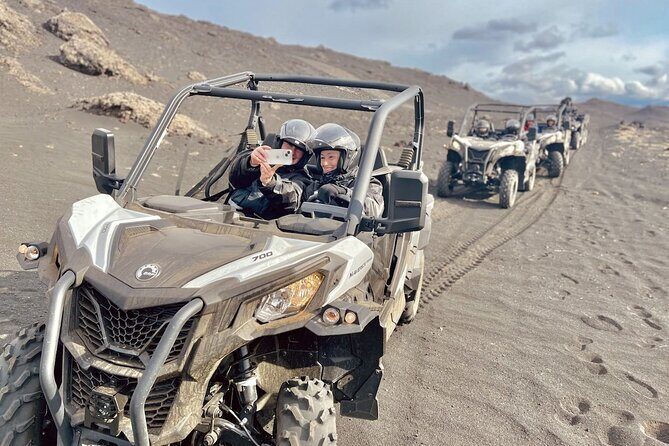
This is a short-burst adventure built around motion. You’ll drive a UTV buggy as you follow a guide along a route chosen for impressive viewpoints and volcanic scenery, with short stops so you can take it in without losing the fun.
The timing is part of the appeal. You’ll spend about 10–15 minutes driving from the base camp to the Hverfjall crossing, then the rest of the tour is broken into several drive-and-stop segments. The total driving time is about 1 hour 30 minutes, which is a lot for a 2-hour experience.
The day also keeps things from feeling rushed. You’re not trying to cover five separate big attractions on foot. Instead, you’re moving across the same volcanic world by vehicle, stopping just long enough to understand what you’re looking at and why it’s there.
You can also read our reviews of more tours and experiences in Reykjahlid.

Price and Value: Why It Costs What It Costs
At $230.96 per person, this isn’t the cheapest thing you can do in Myvatn. But it’s also not selling you on a long day trip or a huge bus tour. You’re paying for time behind the wheel, an English-speaking guide, safety instruction, helmets, and the use of UTV buggies on a curated route.
A big part of the value is the short-group feel. With a maximum of 10 travelers, the guide can manage the driving and talk without turning it into a lecture for a crowd. That matters when you’re learning how to handle a UTV safely and confidently.
Another value point: several places you visit don’t require paid entry during the stops. Lake Mývatn and the other listed stops show free admission in the tour details, so you’re mostly paying for the vehicle experience and guidance rather than ticket fees at each location.
The Real MVP Is the Guide (Alejandro and Alessandro Stand Out in Feedback)
This tour’s quality depends heavily on how the guide frames what you’re seeing. In the feedback, guides like Alejandro and Alessandro come up for being informative, kind, and fun, and for connecting the geology and history of the places along the route in a way that feels like you’re being shown around by someone who actually cares.
You’ll get safety lessons before you drive, but the best guides do two things: they teach you how to handle the UTV, and they help you understand why the ground under your wheels looks the way it does. The tour details promise a route with impressive views, and the reviews back up that the guiding is where the story clicks.
If you’re the kind of traveler who likes a bit of explanation while you travel, you’ll likely feel rewarded on this one. If you just want maximum speed with no talking, you might still enjoy it, but you may find yourself paying attention more than you planned.
Meeting in Reykjahlíð and What to Bring
This activity starts and ends back at the meeting point in Reykjahlíð (listed as M24M+6Q Reykjahlíð). Plan to arrive a little ahead so you’re ready for the pre-drive safety lesson and gear check.
You’ll need your driver’s licence to participate as a driver. The tour includes helmet use, and warm overall clothing is provided if needed, which helps a lot in an area where weather can turn quickly.
Because you’ll be outdoors during driving and stop moments, dress for cold. Even if the tour provides a warm overall if needed, I still recommend bringing your own warm layers and gloves if you have them, so you’re not stuck making do with only what you’re given.
From Base Camp to Hverfjall Crossing: Getting Oriented
The tour begins with a quick repositioning drive. You’ll travel from the base camp to the Hverfjall crossing area in about 10–15 minutes.
This early segment is useful because it sets your expectations. You’ll get a feel for how the guide manages the group, how the UTVs behave on uneven ground, and what the route style is like—vehicle first, short viewing stops second. It also helps you settle in before the longer driving stretch begins.
Expect the pace to be guided rather than chaotic. The whole tour is structured around following your guide, so you don’t have to worry about navigation or figuring out where to pull over.
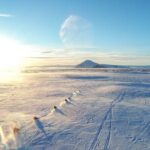
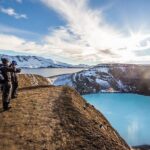
Stop 1: Lake Mývatn and the Nature Reserve Areas
Lake Mývatn is the first major stop in the tour flow. After you start near the meeting area, you’ll drive around the lake zone, focusing on the lesser-visited areas described as hidden nature reserve spots and surroundings.
The tour notes indicate about 45 minutes tied to the Lake Mývatn stop timing. That’s long enough to look around, absorb what you’re seeing, and still keep the day moving. Admission is listed as free for this part of the experience, which is nice because you’re not juggling ticket lines mid-adventure.
What I like about this first stop: it gives you contrast. Starting near the lake helps your brain form a reference point before the route turns into deeper volcanic terrain. You see the variety first, then the tour builds toward the more dramatic lava formations.
Possible drawback: if you’re expecting a single iconic photo spot with lots of time, the stop is more about quick viewing and context. You’re on a driving tour, not a long hike.
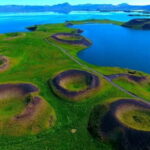
Stop 2: Ludentshaedhir Through Volcanic Terrain
Next comes a short volcanic-region drive toward Ludentshaedhir. The stop time is listed as about 15 minutes.
This part of the tour is quick by design. You’re not trying to do a full exploration here; you’re learning how the ground changes as you move. The value is in the vehicle perspective: you can watch the terrain open up, then look back and realize you just drove across a whole layer of volcanic geography.
Admission is listed as free, so this is again mostly about the experience of seeing how the area works. You’ll likely appreciate this segment most if you enjoy learning while you ride, because the guide can explain what the route is showing you.
If you prefer long, quiet pauses, this might feel like a brief break between driving segments. But it also keeps the adrenaline momentum.
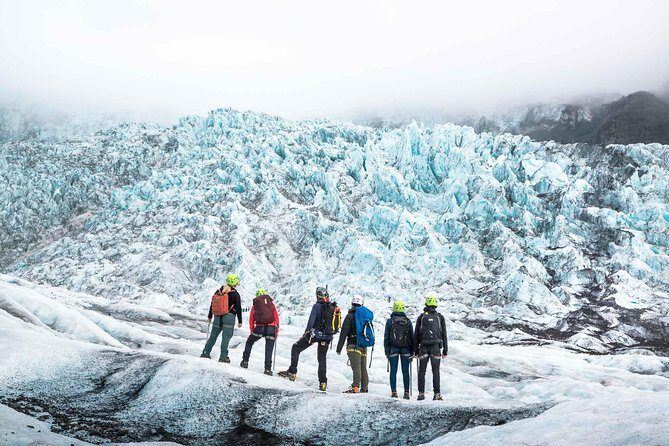
Stop 3: Dimmuborgir Lava Formations on the South Side
Dimmuborgir is the big name here, but the tour approach is what makes it feel different. You’ll drive by the south side of Dimmuborgir and discover the origin of the lava that created the lava fields.
This stop is also listed as about 15 minutes, with a free admission note. That’s enough time to take in the formations and get the explanation for how that lava shaped the area without turning it into a slow walking day.
I like tours that give you a story, not just a view. This one promises you’ll connect what you’re seeing to the origin of the lava fields. If your brain likes cause-and-effect geology, this is where the trip starts clicking.
One consideration: because the stop is short, you may want to focus on listening and looking rather than trying to photograph everything from multiple angles. If you care about photos, pick one or two moments and really frame them well.
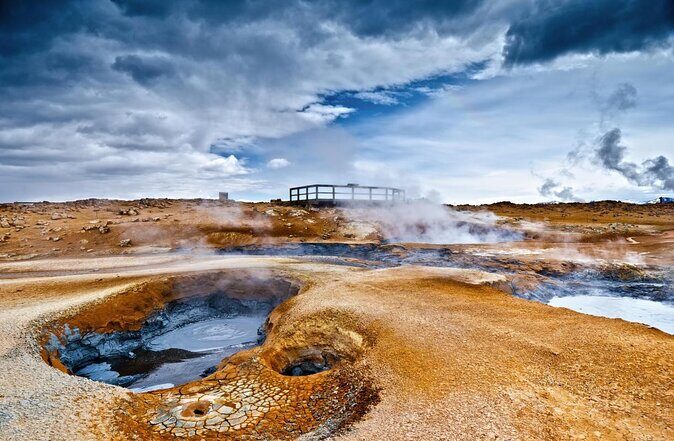
Stop 4: Namafjall Hverir and the Less-Mainstream Side Route
After Dimmuborgir, you’ll head to Namafjall Hverir. The tour notes you’ll drive by Námafjall mountain on the other side of the same volcanic mountain, specifically where very few people visit.
This is another 15-minute segment. The value is in the change of perspective: instead of only seeing what most people associate with the attraction, you get a more side-view look at the same volcanic feature. That can make the area feel bigger and less repetitive.
Admission is listed as free here too. So you’re paying again for guided driving and viewpoint access rather than attraction fees.
The best way to enjoy this stop is to treat it like a viewpoint moment with a mission. Listen for what the guide is explaining, then look for the patterns in the terrain from where you’re positioned. If you enjoy geologic reasoning, this segment can feel surprisingly satisfying for such a short stop.
Stop 5: Reykjahlíð Back Roads Finish the Loop
The last named stop is Reykjahlíð. You’ll drive through the area arriving from the back roads and wrapping up the tour back where you started.
The timing is listed as about 15 minutes. That end segment matters more than you might think. By then, your body is warmed up to the rhythm of driving, and you’re usually better able to notice how the route changed since the first part of the day.
Ending by quieter roads also reinforces that this is a route-based tour, not a single-point attraction day. You get a sense of the wider region without spending extra time commuting between separate activities.
You’ll finish back at the same meeting point, so you can continue your Myvatn day without needing to plan a transfer.
Group Size, English, and the Comfort Factor
The tour caps at a maximum of 10 travelers. That small group size helps in a few ways: safety instruction stays clear, the guide can watch your driving approach, and you don’t spend the stops waiting for people to catch up.
Offered in English and using a mobile ticket system, it’s designed to be straightforward for visitors. Confirmation is received at the time of booking, so you’re not left wondering what happens next.
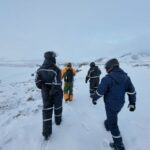
Comfort is handled with two included pieces of gear: helmets and warm overall if needed. That’s a practical win in a place where the temperature can surprise you. In one review describing a cold snowy day in June, the guide made sure people were well-equipped and that the group still enjoyed the tour.
Is This UTV Tour for You?
This tour is a great fit if you want an active way to see the Myvatn region without committing to a long hike. I also think it suits people who like structure: you get safety coaching, you follow a guide on a planned route, and you still spend most of your time driving.
It’s especially good if you enjoy learning something while you move. The route is tied to geology, from the lava story around Dimmuborgir to the volcanic terrain you pass through at Ludentshaedhir and Námafjall Hverir.
I’d be cautious if:
- you don’t have a driver’s licence and your goal is to drive
- you hate cold-weather outdoor time (the tour depends on weather, and stops are outdoors)
- you want long guided walks at each site (this is short stop, drive-forward pacing)
Should You Book This UTV Buggy Tour in Myvatn?
I’d book it if your Myvatn plan needs a punchy, active activity that makes the volcanic terrain feel hands-on. The combination of wheel time, a small group, and safety coaching is the core value, and the route hits several key areas without turning the day into a sprint between far-away locations.
Also, if you appreciate explanations while you’re traveling, this tour has a strong track record for guide storytelling, with names like Alejandro and Alessandro showing up in feedback for being informative and fun.
If you’re on the fence, ask yourself this: do you want to see Myvatn from a vehicle perspective with quick viewpoint stops? If yes, this is a smart use of 2 hours—and a good way to add real adrenaline to a region that you can otherwise experience mostly at lookout points.
FAQ
Do I need a driver’s licence to join the UTV buggy tour?
Yes. The tour notes say you should bring your driver’s licence.
How long is the UTV buggy tour?
It runs for about 2 hours.
How many people are in each tour group?
The maximum group size is 10 travelers.
What language is the tour offered in?
The tour is offered in English.
What gear is included?
A helmet is included, and a warm overall is provided if needed.
Is admission required for the stops?
The tour details list free admission for the stops shown, including Lake Mývatn, and the other listed areas.
Where do I meet for the tour?
The meeting point is listed as M24M+6Q Reykjahlíð, Iceland, and the tour ends back at the same meeting point.
Will I drive the whole time?
You’ll spend a lot of time driving, but the tour includes several short stops for viewing and guidance along the route.
What happens if the weather is poor?
The experience requires good weather. If it’s canceled due to poor weather, you’ll be offered a different date or a full refund.
Is insurance included, and are damage costs covered?
Personal insurance and damage costs are not included, according to the tour details.