REVIEW · SOUTHERN REGION ICELAND
Sólheimajökull Glacier: Guided Hike with Equipment
Book on GetYourGuide →Operated by Holiday Tours · Bookable on GetYourGuide
Walking on a glacier feels unreal. This guided Sólheimajökull hike turns the scary parts into a controlled, step-by-step adventure, with real crampons and an ice axe plus a trained guide. I especially like the way you get right up to deep crevasses, and I also love the hands-on moment where you might sip pure glacier water. One consideration: it’s cold, physical, and it’s not suitable for children under 8 or for people with heart problems.
You’ll spend about 1.5 hours on the ice during the full 2.5-hour outing. That’s a smart setup on a glacier that sits as an outlet glacier of Mýrdalsjökull, Iceland’s fourth-largest ice cap, with dramatic volcanic surroundings all around you. You learn the history and geology of Iceland’s glaciers while you hike, not as a lecture that floats above your head.
Logistics are straightforward. Meet at the Sólheimajökull parking lot (there’s only one), look for the car or mini bus marked Holiday Tours, and arrive 15 minutes early. The guide is English-speaking, and you return right back to the meeting point when the hike wraps up.
In This Review
- Key things I’d bet on before you go
- Sólheimajökull Glacier at a glance: why this hike feels different
- Meeting at the Sólheimajökull parking lot and getting geared up
- Crampons, ice axe, helmet, harness: what’s included and why it matters
- The safety briefing: the part you shouldn’t rush
- Stop 1: Sólheimajökull glacier parking lot—more than just a meet point
- Stop 2: On the glacier—crevasses, formations, and a taste of ice
- What to wear and bring so the cold doesn’t steal your enjoyment
- Food, drinks, and what the price covers (and what it doesn’t)
- Who this glacier hike fits best (and who should skip it)
- Photo tips and pacing: how to enjoy crevasses without panicking
- Weather reality: how to plan your day on Sólheimajökull
- FAQ
- How long is the Sólheimajökull guided glacier hike?
- What gear is included for the hike?
- Where do I meet the guide?
- Does the tour include food and drinks?
- Who is this tour not suitable for?
- What should I bring and wear?
- Should you book this glacier hike?
Key things I’d bet on before you go
- Safety equipment is included (crampons, ice axe, helmet, harness), so you’re not guessing what to rent or bring.
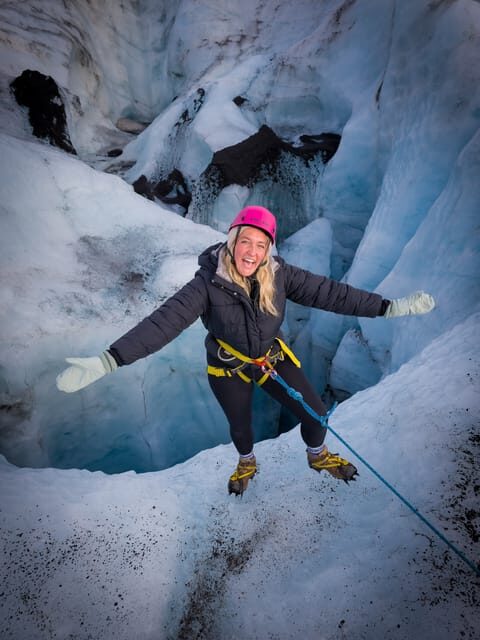
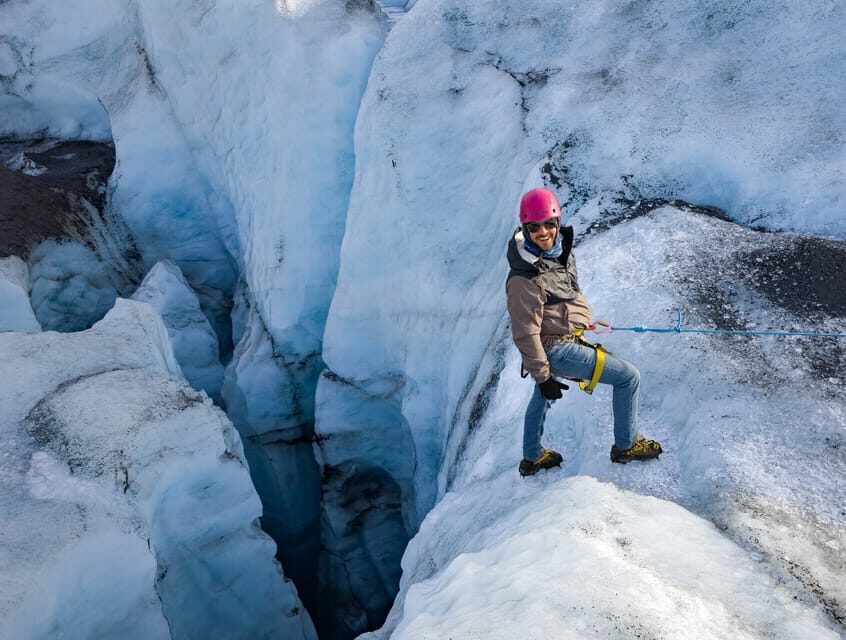
- Deep crevasses up close with a guide leading the route and a safety briefing before you step onto the ice.
- You might taste glacier water and learn why it’s such a big deal in glacial landscapes (and why it’s done as part of the tour experience).
- Time on ice is focused: about 1.5 hours, so you get the glacier without burning a whole day.
- Meeting point is simple: the Sólheimajökull parking lot, easy to find, with Holiday Tours signage.
Sólheimajökull Glacier at a glance: why this hike feels different
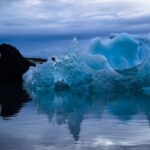
Sólheimajökull is one of those Iceland glaciers where you can see how alive it is. It’s an outlet glacier of Mýrdalsjökull, Iceland’s fourth-largest ice cap, and that outlet positioning matters: the ice doesn’t just sit there. It moves, cracks, and reshapes, which is exactly what makes glacier hiking so visually intense.
What you’re doing here is not just a scenic walk. This hike is designed for safe movement on ice: you’re given gear, walk on centuries-old ice, and follow a guide through glacial formations and at least one deep crack/crevasse. Even though the tour time is short, the experience can still feel big because ice features are dramatic and close-up.
And yes, the setting adds to it. You’ll be hiking in southern Iceland’s volcanic country, where black textures and pale ice are a high-contrast combo. It’s one of the reasons people remember Sólheimajökull long after they’ve moved on to waterfalls or hot springs.
You can also read our reviews of more tours and experiences in Southern Region Iceland.
Meeting at the Sólheimajökull parking lot and getting geared up
The whole experience starts at the Sólheimajökull glacier parking lot. That’s good news for planning: there’s only one meeting point, and you’re told exactly where to go. Look for the car or mini bus marked Holiday Tours, then get ready for the pre-hike check and safety briefing.
You should plan to arrive about 15 minutes before your start time. On glacier tours, the timing isn’t about being strict for fun. It’s because everyone needs to be fitted and checked before you head onto the ice, and you don’t want to rush that part.
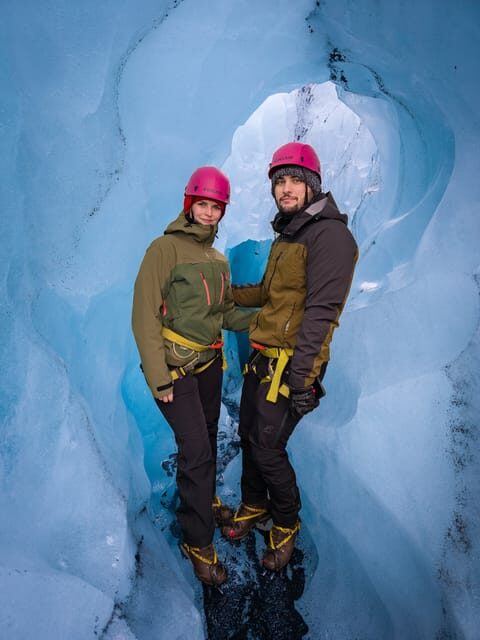
At the parking area, you’ll gear up with the provided safety equipment. This includes crampons, an ice axe, a helmet, and a harness. The key point is that you’re not thrown onto the glacier with guesswork; you go from instructions to equipment to ice, in that order.
Crampons, ice axe, helmet, harness: what’s included and why it matters
This is one of the best-value aspects of the tour: your safety gear is included. You’ll use crampons to grip the ice, an ice axe for stability and control, a helmet for protection, and a harness as part of the overall safety system.
Here’s what that means for you as a traveler. You don’t need to hunt down rentals, figure out sizing, or wonder whether the gear is the right type for an actual glacier hike. You also get a smoother experience at the start, because the guide can ensure the gear fits and is used correctly before you move.
Also, wearing the right clothing matters even when the tour provides the technical gear. You’ll want warm, waterproof layers plus a hat and gloves. Sturdy hiking shoes help too, because you’ll be moving on slick surfaces before and after you’re on the ice.
The safety briefing: the part you shouldn’t rush
Before you step onto the glacier, you’ll get safety instructions. That briefing is a big part of why this hike works for most people who meet the requirements.
Even if you’re comfortable outdoors, glacier hiking has its own rules: ice surfaces can look solid but act differently underfoot, and crevasses are hidden until you’re near them. The guide’s job is to set expectations and help you move safely as a group, not just to point at pretty cracks.
Plan to listen closely during the briefing. It’s not just about avoiding danger. The more you understand how you’re supposed to walk on the ice, the more relaxed you’ll feel once you’re actually there.
Stop 1: Sólheimajökull glacier parking lot—more than just a meet point

The parking lot stop is where you shift from normal travel mode to glacier mode. It’s where you line up, confirm your group, and get your equipment before the safety briefing and the ice time.
The practical win here is simplicity. You’re not coordinating multiple transfers or complicated drop-offs. Holiday Tours meets you there, and after the hike, you return to the same spot.
If you’re thinking ahead: this is where you can use your time wisely. Wear warm waterproof clothing before you arrive if you can. That saves fiddling once you’re cold and geared up.
You can also read our reviews of more hiking tours in Southern Region Iceland
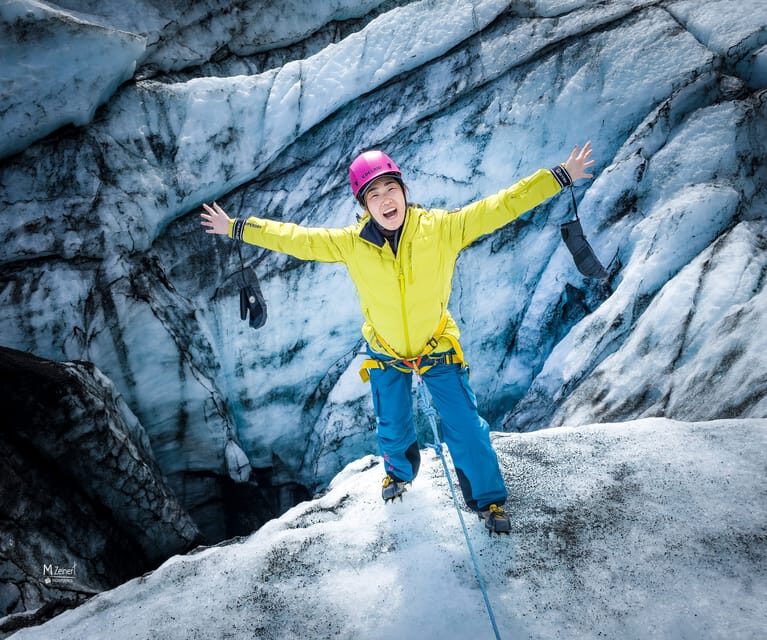
Stop 2: On the glacier—crevasses, formations, and a taste of ice
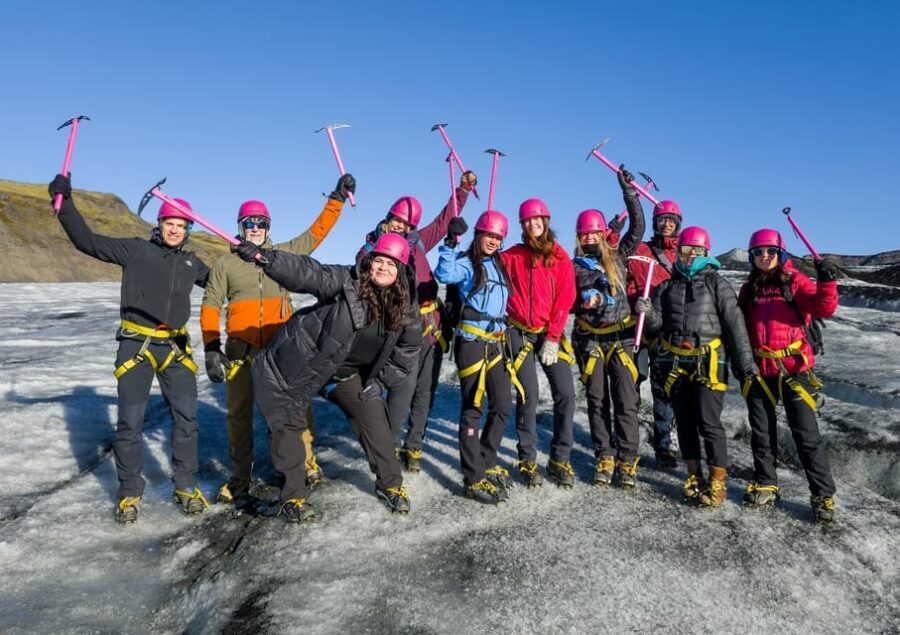
The main event is on Sólheimajökull itself. You’ll spend about 1.5 hours walking on the ice, after the safety briefing. During that time you’ll explore glacial formations, peer into deep crevasses, and learn about the glacier’s history and geology from your guide.
You also get a photo stop included in the tour flow. That matters because some glacier moments happen at angles and distances you’ll want to capture. A designated pause keeps you from stopping abruptly in unsafe places.
Then there’s the moment many people remember: you might sip pure glacier water. The tour doesn’t promise it every time, but it’s part of the experience when conditions allow. Even if you’re not into tasting things on trips, it’s a useful way to connect what you’re seeing to how the ice behaves and what it contains.
A subtle but important point: the value of this stop is not only the views. It’s the combination of close-up ice features with guided explanation. You’re not just looking at cracks; you’re learning how glaciers form, how they change, and why Sólheimajökull’s outlet behavior creates the kind of terrain you can safely explore.
What to wear and bring so the cold doesn’t steal your enjoyment
You don’t need fancy gear, but you do need the right basics. Bring warm, waterproof clothing. Add a hat and gloves so you keep circulation in your extremities. Hiking shoes are recommended since you’ll be walking on slick ground surfaces around the parking lot and during the approach.
You’ll also want water. The tour doesn’t list food and drinks as included, so having water helps you stay comfortable through the 2.5-hour total duration.
If you tend to get cold easily, treat this seriously. Glacier air can feel sharp, and you’ll be standing still at times during instructions. Dress so you can move comfortably but still stay warm if you pause.
Food, drinks, and what the price covers (and what it doesn’t)
Price is $101 per person for a 2.5-hour experience. The value calculation is pretty clear: you’re paying for a guided glacier hike and a full set of safety equipment (crampons, ice axe, helmet, harness). That’s not just a convenience. On a glacier, the safety gear is the core of the experience.
What’s not included is transportation to the meeting point and food and drinks. So build your day around getting to the parking lot, plus plan to eat before or after. If you’re doing Iceland’s typical south-coast route, this fits well as a morning or mid-day activity between longer drives and other stops.
Who this glacier hike fits best (and who should skip it)
This tour isn’t for everyone, and that’s actually a good sign. The hike isn’t suitable for children under 8, pregnant women, people with mobility impairments, or people with heart problems.
If you’re generally healthy, you’ll likely find the hike manageable if you’re comfortable hiking on uneven terrain and staying in cold conditions. The good part is that you’re not doing this alone; the guide leads the route and handles the safety setup.
If you’re worried about comfort or fitness, use the listed restrictions as your baseline. If you’re unsure, it’s worth checking directly with the provider before booking. On a glacier, conditions and safety requirements are real, not theoretical.
Photo tips and pacing: how to enjoy crevasses without panicking
Since there’s a photo stop built into the experience, you’ll have at least one moment to step into gear-friendly positioning and grab pictures without breaking the flow. Use that time well: glaciers are full of texture, and crevasses can create a strong sense of depth from certain angles.
Outside of the photo stop, focus on your footing and follow the guide’s cues. Glacier hiking is not the place for slowing down dramatically or wandering off to chase a perfect shot. If you keep your eyes on the safe walking rhythm, you’ll enjoy more of what’s around you instead of spending energy reacting.
Also, remember the tour includes a lot of instruction. If you listen and move smoothly, the whole experience feels less stressful. You’ll spend more time noticing formations, and less time thinking about what to do next.
Weather reality: how to plan your day on Sólheimajökull
This kind of hike is weather-dependent in practice, even when the schedule is set. Iceland can turn fast: wind, cold, and visibility affect how it feels on the ice.
So, plan this activity for a day where you don’t need to be anywhere else immediately afterward. You’ll return to the meeting point at the end, but you’ll want buffer time for travel on the south coast.
Your biggest controllable factor is clothing. Show up prepared for cold and damp conditions. If you do that, you’ll be able to enjoy the glacier itself rather than your discomfort.
FAQ
How long is the Sólheimajökull guided glacier hike?
The duration is 2.5 hours, with about 1.5 hours spent on the glacier ice. Starting times depend on availability.
What gear is included for the hike?
You get safety equipment including crampons, an ice axe, a helmet, and a harness. You’ll also be guided during the hike.
Where do I meet the guide?
Meet at the Sólheimajökull glacier parking lot. There’s only one meeting point, and you should look for the car or mini bus marked Holiday Tours.
Does the tour include food and drinks?
No. Food and drinks are not included, so you should plan accordingly.
Who is this tour not suitable for?
It is not suitable for children under 8, pregnant women, people with mobility impairments, or people with heart problems.
What should I bring and wear?
Wear warm, waterproof clothing and bring hat, hiking shoes, water, and gloves. Also note that smoking and alcohol or drugs are not allowed.
Should you book this glacier hike?
If you want a glacier experience with real structure, this is a solid choice. You get expert guidance and the safety gear you need to walk on ice, plus time on the glacier to see deep crevasses and learn about glacial formations and geology.
Book it if you’re comfortable dressing for cold weather and you fit the health and age limits. Skip it if you’re unsure about the restrictions, since glacier hiking is physical and the safety setup is non-negotiable.
For the right traveler, it’s one of those rare activities where the “wow” isn’t only the view. It’s the fact that you’re taught how to move safely, then you get close enough to glacier cracks to really understand what you’re looking at.